Assign the right sender
In the campaign's Write view, expand Sender. Dearmailo retrieves sender addresses and aliases from Apple Mail. Use Manage addresses to inspect the available addresses.
Select the senders for this campaign. You can assign a sender to a recipient, use sender information imported with the contact list, or balance recipients across selected senders. Rebalance redistributes assignments, so check the resulting sender for each recipient in Review afterward.
For an imported sender field, use an address available through your connected Mail accounts. If an expected address is missing, use the missing-sender checks.
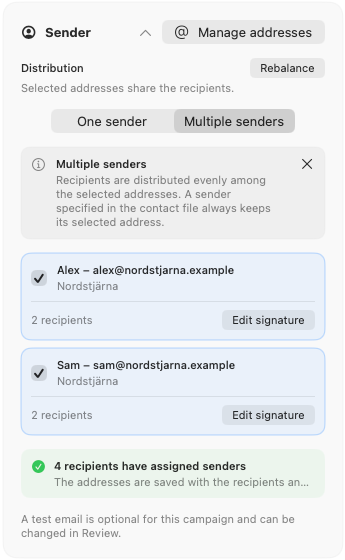
Keep signatures for each sender and language
- Choose the campaign language in Write.
- In the signature area, select the sender you want to edit.
- Choose Add signature or Edit signature. Write a signature, or paste one you already use in Apple Mail, then save it in Dearmailo.
- Repeat for the other senders and languages you use.
Dearmailo selects the signature that matches the sender and campaign language. Changing the language selects a different saved signature; it does not translate your message. Write the subject and body in the language you want recipients to read.
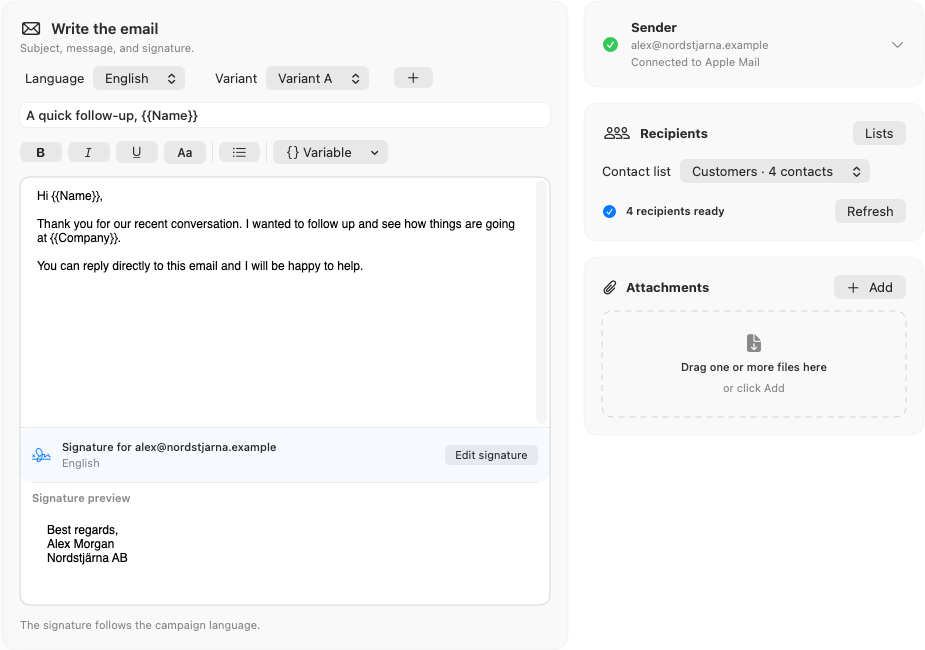
Message variants let you keep several subjects and bodies within a campaign. Review the assigned variant and matching signature for each recipient before sending. Use the review and test workflow after changing them.
Work with more flexible contact files
Alongside Excel workbooks, Dearmailo accepts CSV, TSV, and TXT contact lists. Open Contacts → Import file, choose the file, and check the proposed columns and example values before importing.
Set whether the first row contains headings or contact data. Map the email, name, company, customer number, and sender fields as needed. Retain useful extra columns as custom fields so you can insert them with the Variable menu when writing.
Split a combined field
If one column contains a value such as Anna Lind, Nordstjärna AB, select it for splitting. Dearmailo splits at the first comma. Assign the two resulting fields to Name and Company, and check the preview. The source file is unchanged.
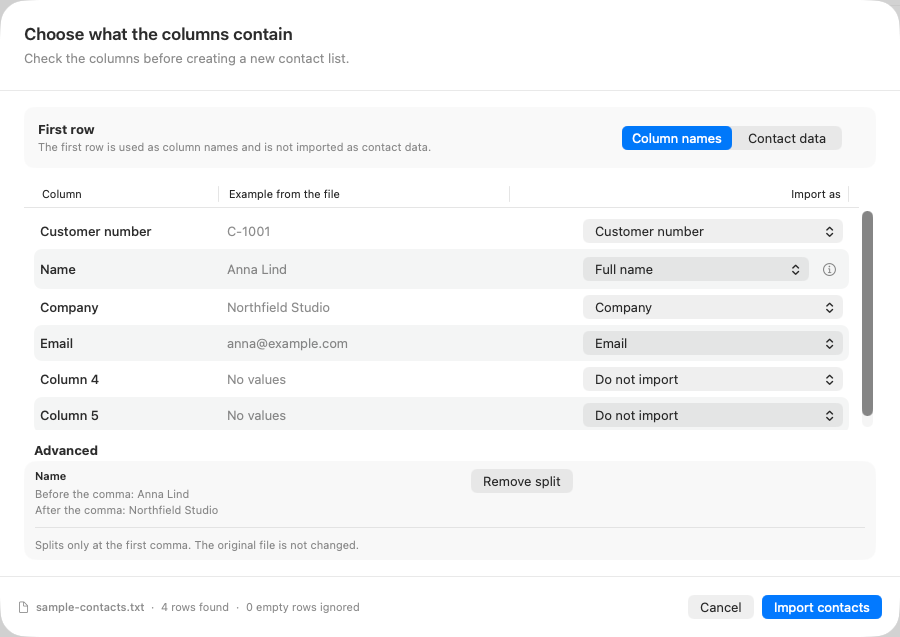
Finish with the import review, including invalid addresses and duplicate contacts.
Set pauses, limits, and retries
Open Send → Pacing and limits. Choose a shortest and longest delay; Dearmailo varies the pause between messages within that range.
- Longer breaks: choose how many messages to send before a longer pause, and how long that pause lasts.
- Per-sender limits: cap the number of messages each sender may send in a run.
- Retries: set the retry count and the delay before another attempt after an error.
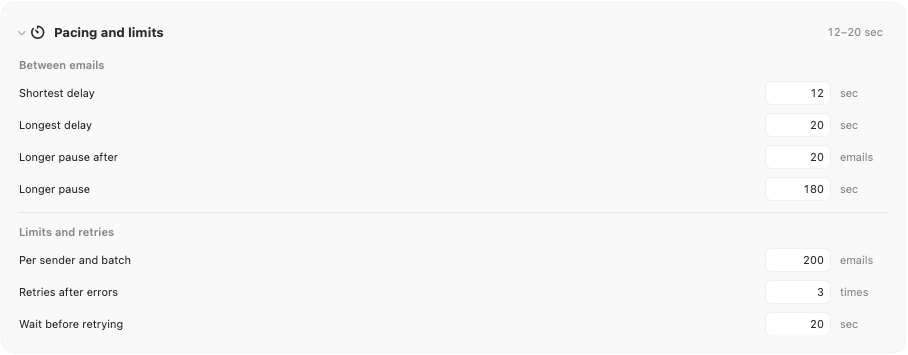
Use settings that fit your mail provider's sending limits. Pacing does not override those limits or guarantee inbox delivery.
Choose a start time in another time zone
- Finish reviewing and testing the campaign.
- In Send, choose Schedule.
- Select the named time zone, then check the start date and local time shown in the dialog.
- Check the recipient and sender counts and estimated completion time, then confirm.
Changing the time zone keeps the displayed local time, so it can change the actual moment the campaign starts. Check both the zone and the time before confirming. This is one start time for the campaign, not a separate local-time schedule for each recipient.
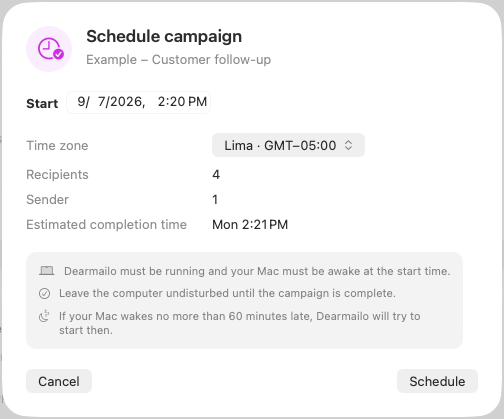
Dearmailo must be running with the Mac awake at that time. Plan an uninterrupted sending window using the sending checklist. Cancel the schedule before editing a scheduled campaign, then review and schedule it again.