Before you start
Mail merge combines a message template with a contact list to create a personalized email for each recipient. Here is what you need to get started:
- A Mac running macOS 15 or later, with Dearmailo installed.
- An account set up in Apple Mail. Follow the setup guide if Dearmailo is not connected yet.
- A contact list saved as
.xlsx,.csv,.tsv, or.txt. - An email address where you can receive a test message.
1. Prepare the contact list in Excel
Put one contact on each row. Give each field its own column, such as First name, Last name, Email, and Company. An email column is required. The other fields are optional, but they give you useful ways to personalize your message.
| First name | Last name | Company | |
|---|---|---|---|
| Anna | Lind | anna@example.com | Nordstjärna AB |
| Maya | Chen | maya@example.com | Juniper Works |
Save the workbook as .xlsx. Dearmailo reads the first worksheet, so put the contact list there. Older .xls files, macro-enabled .xlsm files, and password-protected workbooks are not supported.
2. Import and check the columns
Open Contacts in Dearmailo. Choose Import file and select your contact list. Importing from All contacts creates a named list; importing within an existing list adds or updates its contacts.
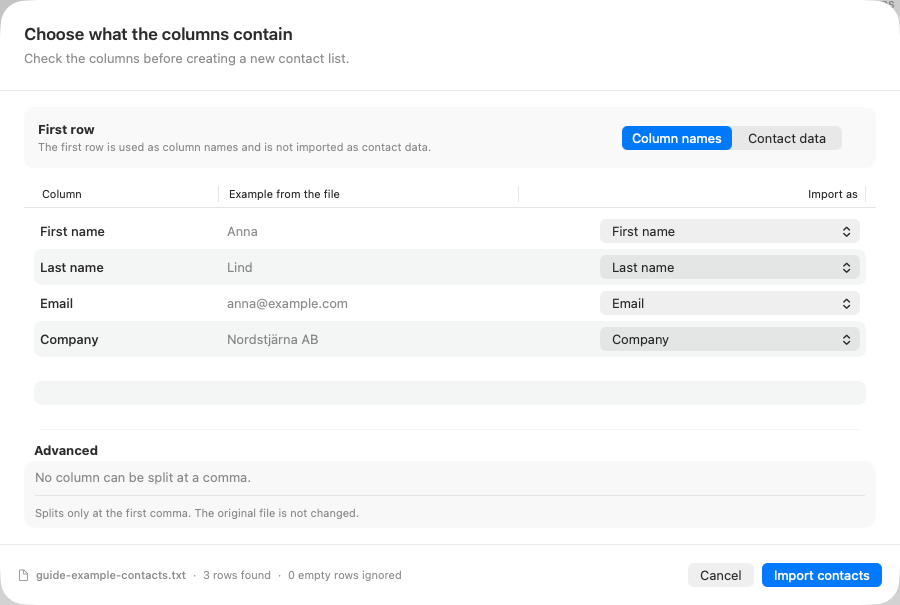
In Choose what the columns contain, check whether the first row contains column names or contact data. Then review the proposed role beside each column. Match your email column to Email and the name and company columns to their corresponding fields.
Check the import review
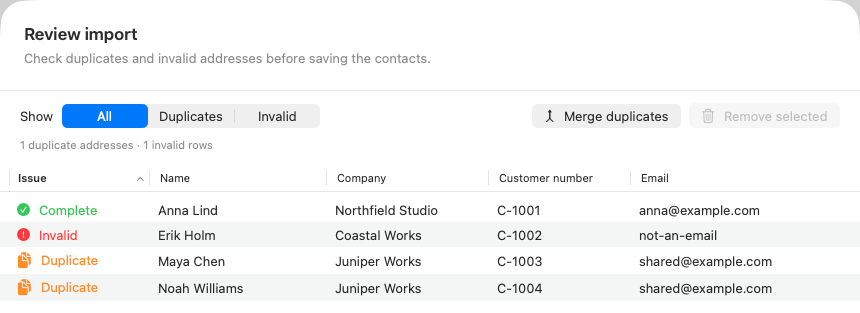
Check the example values, then review any invalid addresses and duplicate entries before confirming the import. Invalid addresses are skipped. Use Merge duplicates to combine compatible entries; if values conflict, choose which contact to keep. Unresolved duplicate addresses must be handled before importing.
For combined fields and other import options, see advanced contact imports.
3. Write the email in Dearmailo
Switch to Campaigns and create a new campaign. In Write, choose the imported contact list under Recipients.
Write your subject and message. Use the Variable menu to insert a contact's name, company, or another imported field. For example, use a first name in the greeting and a company name in the body.
Use the formatting toolbar, or Command-B, Command-I, and Command-U for bold, italic, and underline. Add attachments with the file picker or drop them into the attachment area.
Select the sender and campaign language, and check the signature beneath the message. If you need to add one, follow signature setup.
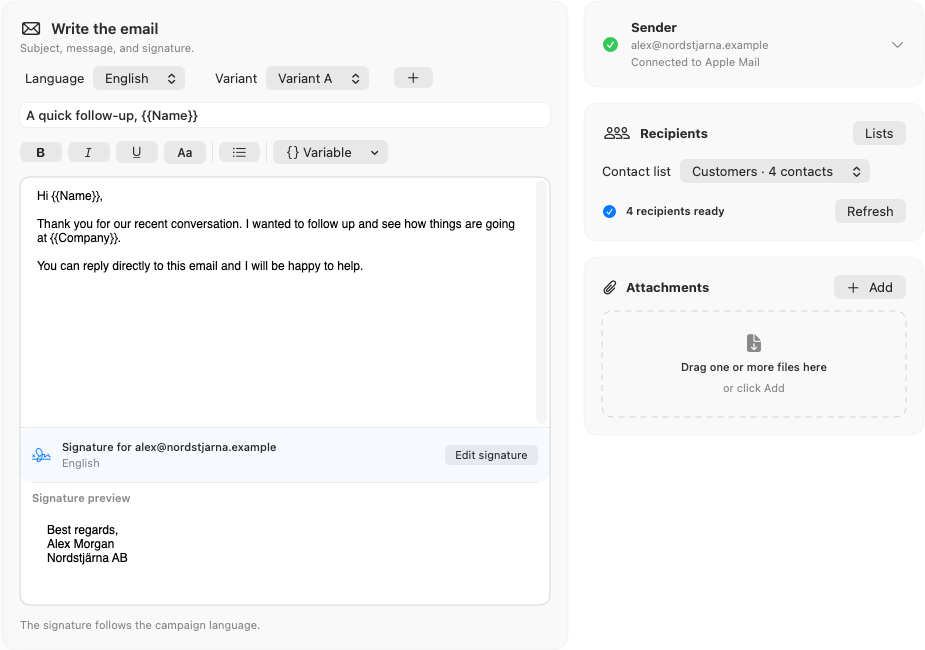
Each campaign uses a saved copy of its contact list. If you update the list, choose Refresh under Recipients to bring those changes into the campaign, then review the messages again.
4. Review each recipient and send yourself a test
Open Review. Move through the recipients and check the greeting, company, subject, sender, signature, and any attachments. Resolve missing values for variables used in the message.
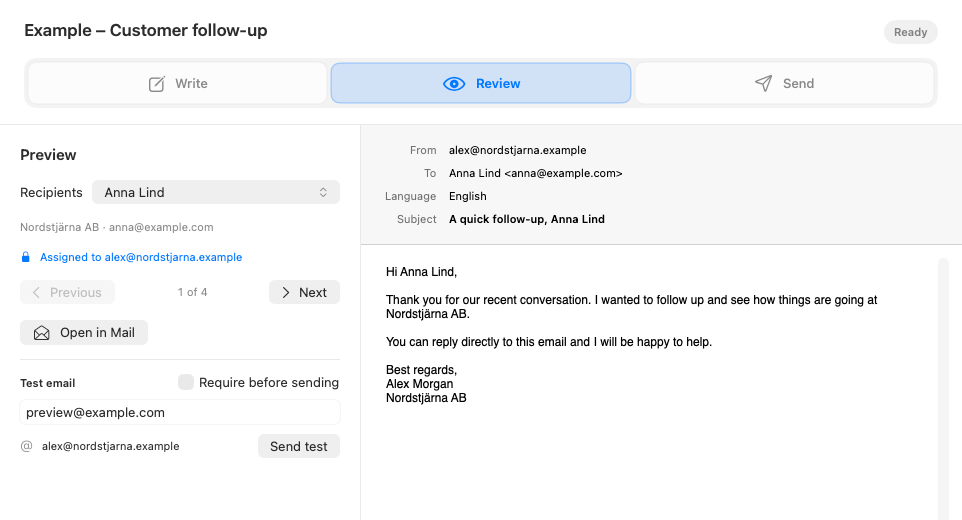
Enter an address you control and choose Send test, then check the email in your inbox. Test each sender you plan to use, and repeat the test after changing the message, sender, signature, or attachments.
Enable Require before sending to make a test email part of your final checks.
5. Send separate messages through Apple Mail
Open Send, review the final checks, and choose your pacing. When you start the send, Dearmailo prepares a separate message for each recipient and sends it through Apple Mail.
Check the results when the queue finishes. “Sent via Mail” confirms that Apple Mail accepted the send command; final delivery depends on the recipient's mail provider.